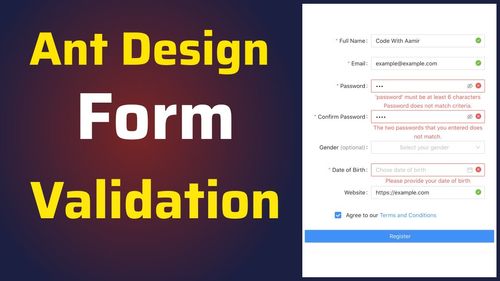
Are you a React developer looking to implement robust email validation in your web applications using Ant Design? You're in the right place. In this comprehensive guide, we'll dive deep into email validation in React while harnessing the power of Ant Design components. Whether you're a beginner or a seasoned pro, this article has something for everyone.
Understanding Email Validation
Email validation is a critical part of web development. It ensures that the email addresses entered by users are both accurate and properly formatted. Without this validation, your application may encounter issues related to user data, communication, and even security.
Why Ant Design?
Ant Design is a popular React UI library that offers a wide range of highly customizable and well-designed components, making it an excellent choice for building user interfaces. It includes components like <Input /> and <Form />, which are fundamental to email validation.
Getting Started with Ant Design Components
Before we delve into email validation, let's briefly cover how to get started with Ant Design components in a React project. You can install Ant Design using npm or yarn:
npm install antd
# or
yarn add antd
After installation, you can import and use Ant Design components in your React application.
Implementing Email Validation with Ant Design
Now, let's get to the heart of the matter—implementing email validation with Ant Design. We'll cover two essential aspects: client-side validation and server-side validation.
Client-Side Validation:
Ant Design's <Input /> component allows you to perform client-side validation effortlessly. You can use regular expressions to check if the entered email is properly formatted. Here's a simple example:
import { Input } from 'antd';

const EmailInput = () => {
  const validateEmail = (rule, value, callback) => {
    const emailRegex = /^[A-Za-z0-9+_.-]+@(.+)$/;
    if (!emailRegex.test(value)) {
      callback('Invalid email address');
    } else {
      callback();
    }
  };

  return (
    <Form.Item
      name="email"
      label="Email"
      rules={[
        { required: true, message: 'Email is required' },
        { validator: validateEmail },
      ]}
    >
      <Input />
    </Form.Item>
  );
};
Server-Side Validation:
While client-side validation is essential for a seamless user experience, server-side validation is crucial for security and data integrity. You should always validate email addresses on your server to ensure they exist and are not associated with malicious activities.
Frequently Asked Questions
1. Can I customize the error messages for email validation in Ant Design?
- Yes, you can customize error messages by modifying the
messageproperty in the validation rules.
2. Are there any third-party libraries that can simplify email validation in React with Ant Design?
- Yes, you can explore libraries like Yup for more advanced validation scenarios.
3. How can I prevent form submission if email validation fails?
- Ant Design's
<Form />component offers avalidateFieldsmethod that you can use to validate all fields before submission.
4. Are there any security concerns with client-side email validation?
- Client-side validation is for user experience and should not be relied upon for security. Always perform server-side validation to ensure data integrity.
Conclusion
Mastering email validation in React with Ant Design is a valuable skill for any web developer. It not only enhances user experience but also contributes to data accuracy and security. By following the examples and best practices outlined in this comprehensive guide, you'll be well-equipped to implement effective email validation in your React applications. So, roll up your sleeves and start building web forms that capture valid and reliable email addresses with confidence.


