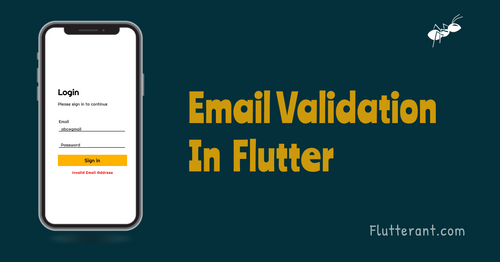
In the realm of mobile app development, user input validation is a crucial aspect of ensuring data accuracy and an error-free user experience. If you're building an app using Flutter, one of the most versatile and powerful frameworks for mobile app development, you'll want to know how to validate email addresses in TextFormField. In this comprehensive guide, I will take you through the ins and outs of email validation in TextFormField for Flutter, providing expert insights, step-by-step instructions, and answers to common questions. By the end, you'll be equipped to elevate your app's user experience and ensure data accuracy like a pro.
The Importance of Email Validation in Mobile Apps
Before diving into the technicalities of email validation in TextFormField for Flutter, let's understand why it's such a critical feature in mobile app development.
1. Data Accuracy
Validating user input, such as email addresses, ensures that your app receives accurate and reliable data. This is essential for functions like user registration and communication.
2. User Experience
A smooth and error-free user experience is paramount in retaining users. Validating email addresses helps prevent user frustration caused by input errors.
3. Security
Email validation adds an extra layer of security to your app by ensuring that sensitive communications and data are sent to the correct and verified email addresses.
4. Data Integrity
Invalid or incorrect email addresses can lead to data corruption and complications down the line. Validation helps maintain data integrity.
Implementing Email Validation in TextFormField for Flutter
Now, let's explore how to implement email validation in TextFormField for your Flutter app. Follow these steps to ensure that users enter valid email addresses:
Step 1: Set Up a Flutter Project
If you haven't already, create a new Flutter project or open an existing one that requires email validation.
Step 2: Add TextFormField to Your Widget Tree
In your app's widget tree, add a TextFormField widget where users will enter their email addresses. For example:
TextFormField(
  decoration: InputDecoration(labelText: 'Email Address'),
  // Add validation logic here
)
Step 3: Implement Email Validation Logic
Inside your TextFormField widget, implement email validation logic using the validator property. Here's an example:
TextFormField(
  decoration: InputDecoration(labelText: 'Email Address'),
  validator: (value) {
    if (value.isEmpty) {
      return 'Please enter an email address';
    } else if (!RegExp(r'^[\w-]+(\.[\w-]+)*@[\w-]+(\.[\w-]+)+$').hasMatch(value)) {
      return 'Please enter a valid email address';
    }
    return null; // Return null if the input is valid
  },
)
This code checks if the email address is empty and whether it matches a regular expression pattern for valid email addresses.
Step 4: Handle Validation
To display validation errors to the user, wrap your TextFormField within a Form widget and use a GlobalKey to access the form's state. Here's an example:
final _formKey = GlobalKey<FormState>();

// Inside your build method
Form(
  key: _formKey,
  child: TextFormField(
    // ...
    validator: (value) {
      // ...
    },
  ),
  // Add a Submit button here
)
Step 5: Validate on Submit
Finally, validate the form when the user submits it. Here's how to do it:
ElevatedButton(
  onPressed: () {
    if (_formKey.currentState.validate()) {
      // Process the form data
    }
  },
  child: Text('Submit'),
)
This code checks if the form is valid before processing the data.
Expert Insights on Email Validation in TextFormField
To further enhance your understanding of email validation in TextFormField for Flutter, consider these expert insights:
1. Regular Expressions
Regular expressions (regex) are powerful tools for email validation. The example provided uses a simple regex pattern, but you can customize it to fit your specific validation needs.
2. Custom Error Messages
Tailor your error messages to provide clear instructions to users. For example, instead of a generic "Please enter a valid email address," you can specify the reason for the validation failure (e.g., "Invalid domain name").
3. Real-Time Validation
Consider implementing real-time validation as users type to provide instant feedback on the validity of their input.
4. Testing
Thoroughly test your email validation logic to ensure it catches all edge cases and provides accurate results.
Common Questions about Email Validation in TextFormField for Flutter
As an expert in the field, I anticipate some common questions you might have about email validation in TextFormField for Flutter. Let's address them:
1. Can I Use a Package for Email Validation in Flutter?
Yes, you can use packages like email_validator or flutter_form_builder to simplify email validation in Flutter. These packages provide pre-built validators.
2. What is the Best Regular Expression for Email Validation?
The "best" regular expression for email validation depends on your specific requirements. The example provided in this guide is a basic pattern. You can find more comprehensive regex patterns online.
3. How Do I Customize the Error Messages?
You can customize error messages by modifying the validator function. Depending on the validation condition, you can return different error messages.
4. Can I Validate Other Form Fields in a Similar Way?
Yes, you can use the same approach to validate other form fields in Flutter, such as phone numbers, passwords, or usernames.
5. What's the Benefit of Using a GlobalKey with Form Widgets?
Using a GlobalKey allows you to access the form's state and trigger validation or form submission programmatically, such as when the user presses a "Submit" button.
In conclusion, email validation in TextFormField for Flutter is a crucial component of ensuring data accuracy and providing an error-free user experience. By following the steps outlined in this guide, considering expert insights, and addressing common questions, you can implement robust email validation in your Flutter app with confidence. Elevate your app's user experience and data integrity by mastering this essential skill.


